Moto 360 Sport初体验 - 吴明
- 前奏
- 美版
- 第一连接需要连接Android手机
- 需要翻墙
- 应用
- Android Wear
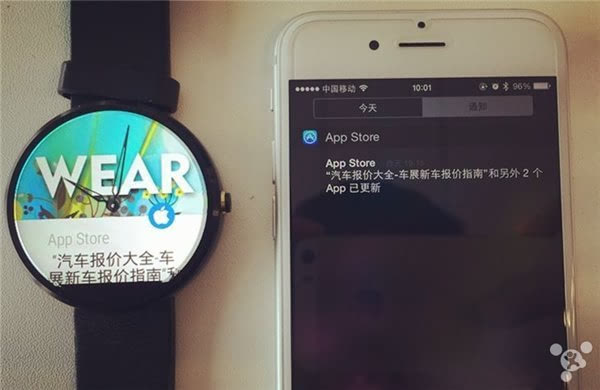
- WearADay
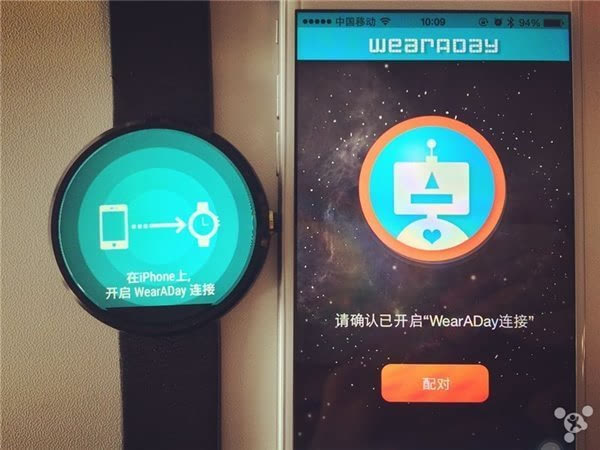
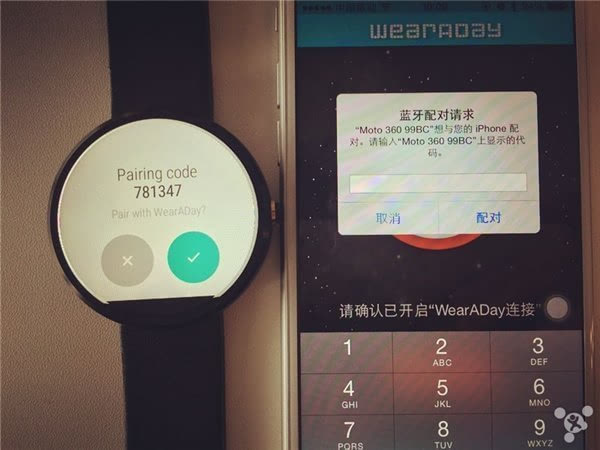
- iPhone支持
- 无需越狱,连接应用WearADay
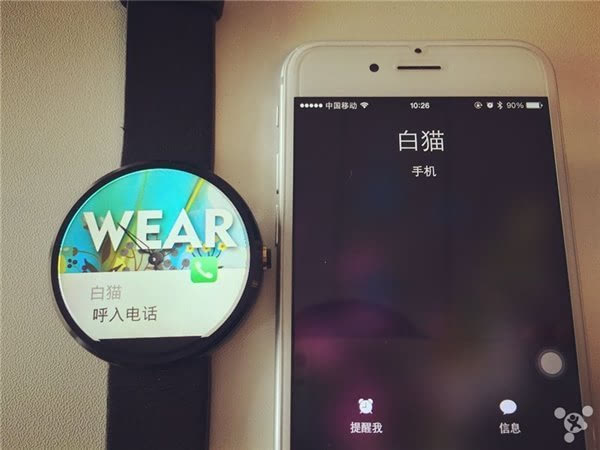
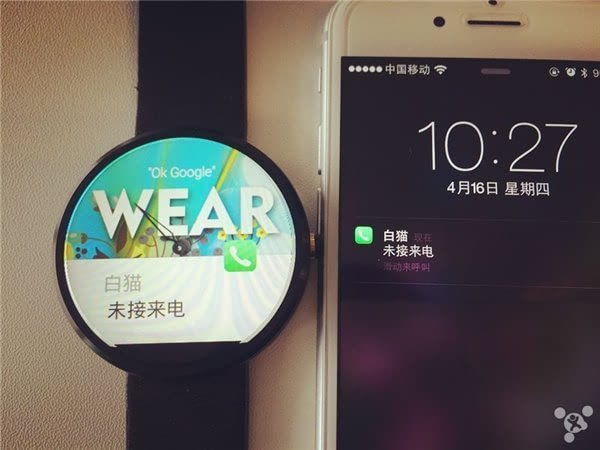
- 包括来电,信息以及各种应用的通知,包括 QQ,微信等等在 iPhone 和 Moto360 配对成功之后都可以在 Moto360 上显示
- 无需越狱,连接应用WearADay
- Android支持
- 微信:表情回复,语音回复,文字回复
- QQ:未测
- 缺陷
- 分辨率不高
- 目前测试没有好的输入法每次提示都是在连接手机输入但每次都是提示手机不在附近


开发者模式安装应用
- 打开手机以及手表的开发者选项
- 手机端:设置-关于手机,找到“版本号”,对着它连续点击7下即可开启,开机后进入“设置”-“开发者选项”,勾选“USB调试

- 手表端:长按右侧按钮唤出设置界面-“About”,找到“Build number”,对着它连续点击7下即可开启,开启后进入设置-“Developer options”,按图所示开启“ADB debugging”和“Debug over Bluetooth”

- 打开Android Wear软件,勾选设置菜单里的“Debugging over Bluetooth”。
- 你可以发现“Host”是disconnected未连接状态,这是代表手表端;“Target”是手机端,connected已连接状态;怎么让手表端的显示已连接呢?请继续往下看

把手机连接上电脑,在adb工具的文件夹里调出命令行,依次输入以下命令
1
2
adb forward tcp:4444 localabstract:/adb-hub
adb connect localhost:4444分两次输入(电脑需支持adb命令,如果不支持请百度Mac配置adb,Window配置adb两个链接是未测试)
- 输完以上两条命令后,留意手机,会弹出允许USB调试的窗口,勾选总是允许,点击OK即可,这时你就发现代表手表端的“Host”就变成connected已连接状态了,嗯,这就代表可以再电脑执行adb命令来控制手表了

相关命令
- adb devices (显示已连接的设备,如图所示,会显示出2个设备名,分别对应手机和手表)

adb -s 手机ID号 install xxx.apk(给手机安装软件,要注意加上手机ID号,比如我的就是 adb -s TA26901ZLK install xxx.apk )
- adb -s localhost:4444 install xxx.apk(给手表安装软件,MOTO 360的软件apk可以通过Android Wear软件专题下载,这里是通过手机的蓝牙给手表安装的,所以传输速度稍慢,要耐心等待,安装成功后会有提示)
- adb -s localhost:4444 unistall xxx(卸载手表端的某个软件,比如adb -s localhost:4444unistall com.whirlscape.minuum)
查看Moto 360所有app的packages
1
adb -s localhost:4444 shell pm list packages
卸载指定包名的app
1
adb -s localhost:4444 uninstall [-k] <insert package name here>
- 打开手机以及手表的开发者选项
Android NFC - 杨俊构
NFC 定义
- From Android dev
Near Field Communication (NFC) is a set of short-range wireless technologies, typically requiring a distance of 4cm or less to initiate a connection. NFC allows you to share small payloads of data between an NFC tag and an Android-powered device, or between two Android-powered devices.
Tags can range in complexity. Simple tags offer just read and write semantics, sometimes with one-time-programmable areas to make the card read-only. More complex tags offer math operations, and have cryptographic hardware to authenticate access to a sector. The most sophisticated tags contain operating environments, allowing complex interactions with code executing on the tag. The data stored in the tag can also be written in a variety of formats, but many of the Android framework APIs are based around a NFC Forum standard called NDEF (NFC Data Exchange Format).
NFC应用

NFC通信技术原理
- 支持NFC的设备可以在主动或被动模式下交换数据

NFC Android开发
- NFC 感应事件分发

- NFC 感应数据处理流程

- NFC Card Readder Demo
参考 Android 开发 http://developer.android.com/guide/topics/connectivity/nfc/nfc.html
NFC标签种类
- NFC 官方分类

- Android API 支持的标签种类
参考http://developer.android.com/guide/topics/connectivity/nfc/advanced-nfc.html
NFC 开发的建议
1.多了解芯片的功能和卡片的类型,
2.获得更多芯片厂商的资料,更多的接口信息
3.了解数据的解析方法
4.多打log,写更详细的log给自己,更简明的log给使用者
NFC展望
1.数据安全的问题日益严重
2.手机SIM卡的NFC功能会逐渐发展
3.卡片会更智能,点到点的应用会更多
4.应用更广,价格更便宜
Android Support Library 23.2 推出之后,增加了几个功能,例如支持Vector Drawables 和Animated Vector Drawables;增加AppCompat DayNight 主题;Design 库中增加Bottom Sheets,RecyclerView 支持 auto-measurement,之前的wrap_content ,match_parent 都将可以发挥作用等等
公司的App 之前使用过第三方的[BottomSheet] (https://github.com/soarcn/BottomSheet ),现在Android 有自己的BottomSheet 那还不赶紧换成原生的。然而好事多磨,Android 原生BottomSheet 资料太少,深研下去发现BottomSheet 就是个大坑!
BottomSheet 的使用 - 王进
BottomSheet 使用需要CoordinatorLayout作为父布局,BottomSheet 的布局作为CoordinatorLayout 的子布局,并且BottomSheetBehavior(比如加上app:layout_behavior=”android.support.design.widget.BottomSheetBehavior”)
1 |
|
实际使用过程中主要依靠BottomSheetBehavior来控制BottomSheet的展示及回调。
BottomSheetBehavior 具有五种状态:
STATE_COLLAPSED: 默认的折叠状态, bottom sheets只在底部显示一部分布局。显示高度可以通过 app:behavior_peekHeight 设置(默认是0)
STATE_DRAGGING : 过渡状态,此时用户正在向上或者向下拖动bottom sheet
STATE_SETTLING: 视图从脱离手指自由滑动到最终停下的这一小段时间
STATE_EXPANDED: bottom sheet 处于完全展开的状态:当bottom sheet的高度低于CoordinatorLayout容器时,整个bottom sheet都可见;或者CoordinatorLayout容器已经被bottom sheet填满。
STATE_HIDDEN : 默认无此状态(可通过app:behavior_hideable 启用此状态),启用后用户将能通过向下滑动完全隐藏 bottom sheet
设置状态:
bottomSheetBehavior.setState(BottomSheetBehavior.STATE_EXPANDED);
回调:
1 |
|
强调:
- BottomSheet 点击展示的默认是折叠状态,不是完全展开状况,所有如果需要完全展开,请设置展开状况
BottomSheetDialog
BottomSheetBehavior将能帮你实现 常驻bottom sheet( persistent bottom sheet)的场景, 但这个版本还提供了BottomSheetDialog 和 BottomSheetDialogFragment 来实现 modal bottom sheets的场景。只需要将AppCompatDialog 或者AppCompatDialogFragment分别替换成上述的两个控件,你就拥有了 bottom sheet 风格的对话框
坑1:
然而我们实际我们需要BottomSheetDialog 是展开的,而BottomSheetDialog只展示一部分
原因:BottomSheetDialog默认是STATE_COLLAPSED,所有BottomSheetDialog 依靠peekHight来设置高度,系统BottomSheetDialog 默认高度为256dp(查源码得知),那按理来说我们的BottomSheetDialog 高度该是256dp,但是我们实际发现BottomSheetDialog高度也不等于256dp。我们研究下BottomSheetBehavior的中控制BottomSheetDialog高度源码:
1 |
|
通过源码我们可以得知BottomSheetBehavior通过改变child的偏移量而控制BottomSheetDialog的高度,默认状态为STATE_COLLAPSED,child向下移动mMaxOffset高度,从而控制child显示高度为mPeekHeight,这就需要child与parent 顶部对齐,child的getTop 为0;
然而我们再去查看Android的BottomSheetDialog 内中布局R.layout.design_bottom_sheet_dialog,发现我们自定义的的BottomSheetDialog 的contentView 是放置在FrameLayout 中的,然而FrameLayout出于某些原因为垂直居中的,而不是顶部对齐,从而导致BottomSheetDialog在256dp的基础上向下偏移,只展示一部分。
所以我们可以通过下面方法解决BottomSheetDialog 的显示问题
解决方法如下:
通过bottomSheetDialog中contentView得到parentView,通过parentView 得到BottomSheetBehavior
测量bottomSheetDialog布局中content的高度,设置peekHight
设置bottomSheetDialog 的contentView 对应的父布局CoordinatorLayout的Grivity 为Gravity.TOP | Gravity.CENTER_HORIZONTAL;
1 |
|
坑2:
当我们设置bottomSheetDialog每次点击后不new,而是直接show的话,然而当我们会bottomSheetDialog 展开后,我们将BottomSheetDialog划下隐藏后, 再点击展示BottomSheetDialog后,会发现页面只是变暗,BottomsheetDialog未展开,这是由于之前我们划下收缩隐藏BottomSheetDialog后,bottomSheetDialogBehavior的状态为隐藏,再次show之后,系统未恢复bottomSheetDialogBehavior的状态,还是隐藏,所以再次点击后页面只是变暗。
1 | @Override |